A couple months ago I bought a 3D printer to satisfy my interest in the technology, and for the more exact purpose of creating miniatures for tabletop gaming. Years earlier I had researched 3D printing for my novel Tokyo Green, and now I was excited to explore the technology first-hand.
My excitement abated somewhat as I struggled to overcome a steep learning curve and understand why some prints failed. 3D printers had improved in price and performance in recent years, but they weren’t exactly like a microwave oven you could just plug in and use countless times without problems.
I was always okay with a learning curve as long as it involved expanding my creative output, and it was a good thing I liked learning, because this new hobby would require an extra dose of dedication to launch.
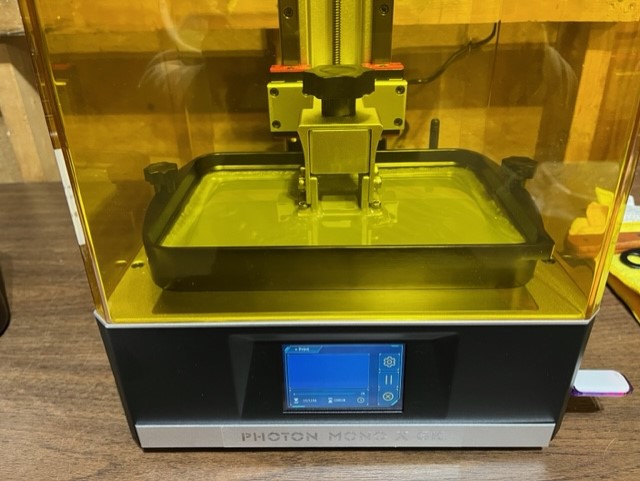
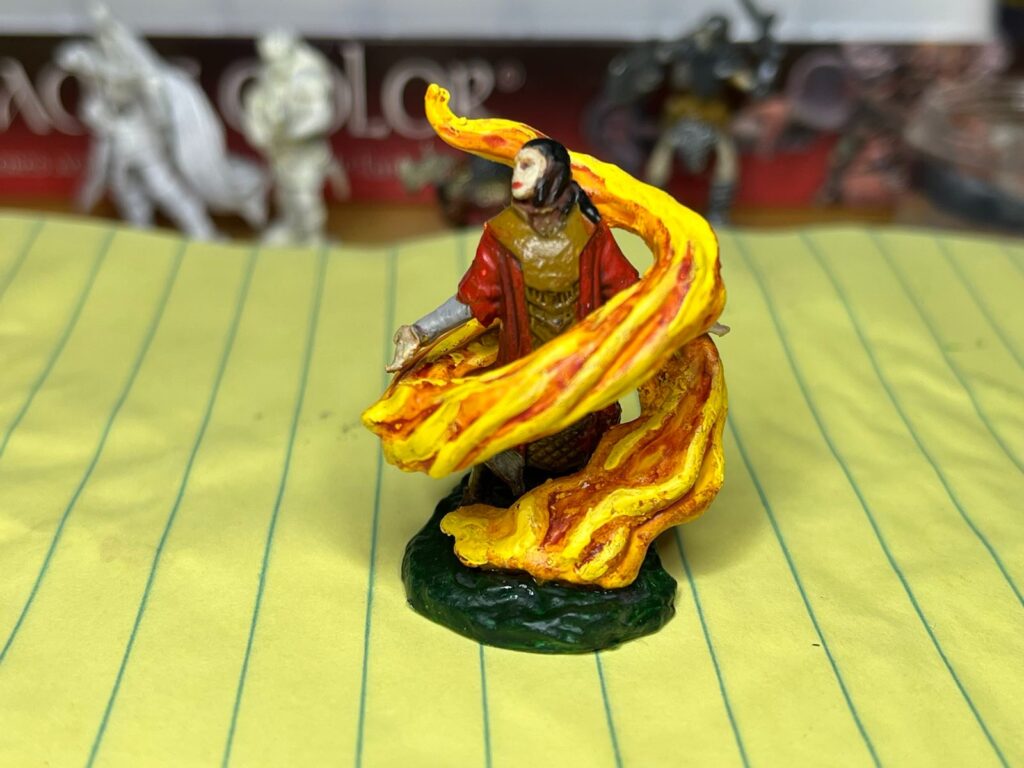
Stereolithography (SLA) printers functioned on a simple principle: there was a vat of photosensitive liquid polymer resin that was cured and hardened with precise blasts of ultraviolet light. The bottom of the goo vat was a thin, durable, clear plastic screen called the FEP (acronym meaning?), and below the FEP was the thin LCD screen that coordinated the ultraviolet light show to cure the resin. Above the vat was a metal build plate that squished down into the goo until there was only a thin layer between the plate and FEP. This layer was cured by the UV light in the precise pattern of the digital model, designed by “slicer” software (referring to the model being designed in layers, or slices). During a print, the plate lifted, and the process repeated until the model was created, layer by layer. A simple model 30 mm (a little more than an inch) in height could require a thousand layers and take hours to print. But the detail was impressive and it was fun to create.
For the first month or so the printer operated very well. It was humming along, churning out mobs of heroes and monsters for our gaming sessions. At the end of October we stayed a couple nights at a U.S. National Park in southern Utah, and when we returned the weather had changed. It was cold, getting down to near freezing in the garage where I had set up my little printing lab. At this point the 3D prints began to fail. I contacted vendor support for advice, but meanwhile I also bought an insulated enclosure, heater, and thermostat to keep the printer within the recommended range of 20-35 C. Based on my research, I was betting temperature was the problem.

As it turned out, temperature was not the problem, or at least it was not the only problem. The print failures kept happening even with the appropriate heat. Working with support, I upgraded the firmware, reattached motherboard ribbon cables, and ran diagnostics on the UV output. Based on the results, Support judged it was a faulty LCD screen. They sent a replacement kit to me on a slow boat from China. It took almost three weeks to arrive.
Meanwhile I also bought a new resin tray, as the FEP on the original tray had become cloudy and scratched, with some deep divots in it. At that time I didn’t realize it was possible to replace only the film on the tray and thereby save some money.
The LCD screen arrived in a nice plastic carrying case. It was a huge pain to remove the original screen, as it was firmly cemented to the frame. It took a half hour or so of dissolving the glue with isopropyl alcohol and gently pressing from underneath with my hand lodged in the chassis. I wanted to avoid shattering the glass screen and sending the shards into the UV light. The new screen was very easy to mount and plug into the motherboard. The diagnostics looked good after the install. I tried printing the default model and … success! I was back in business.
The Terrain Problem
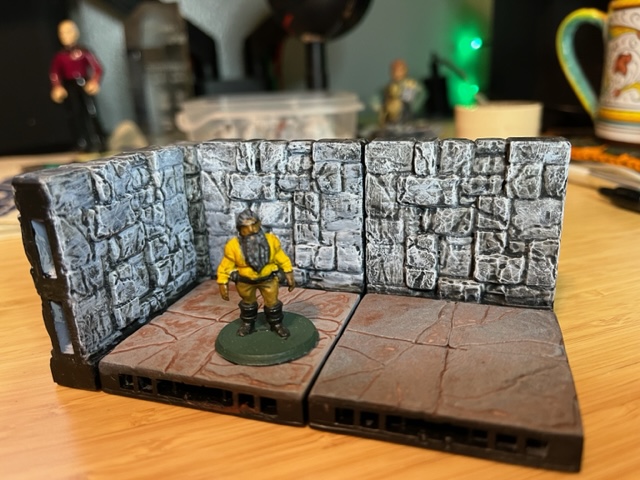
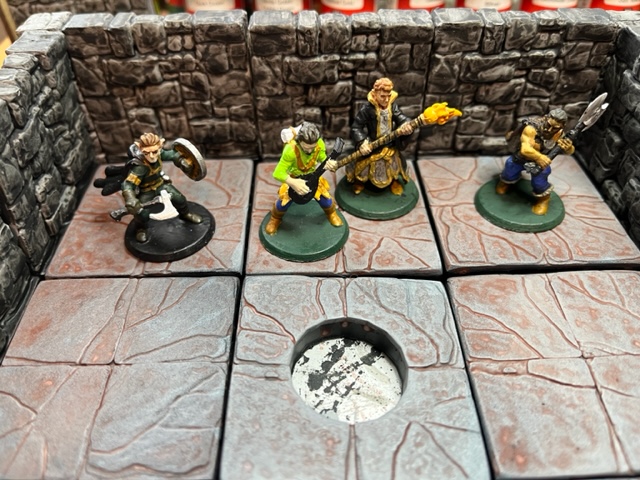
A few weeks later I got the idea to print some terrain – dungeon walls and floor tiles – to bring to life a major encounter area I had designed for an upcoming D&D adventure. The floor tiles turned out great, though the last one was warped on one corner, reminiscent of the problem I saw before the LCD screen went out.
(I also spent an insane amount of time one week printing and assembling magnet clips to hold the floor tiles together, but that was another story.)
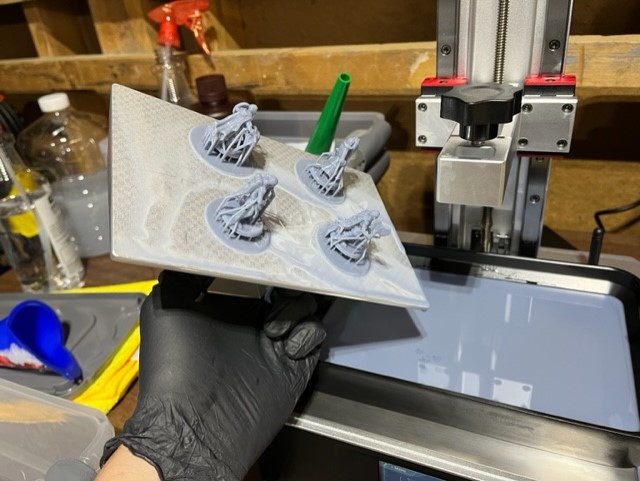
The first wall piece turned out perfectly, so I tried four wall pieces at once, making three duplicates of the original wall piece in the “slicer” design. Normally supports were used to print the model at an angle, but walls printed pretty well vertically because there was no overhang or edges jutting out. From a design point of view it was just a thousand or so rectangular layers stacked on top of each other.
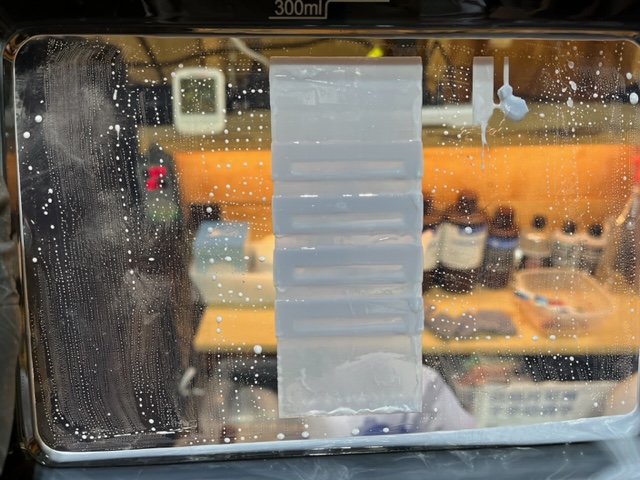
Still, the batch of four walls failed. They stuck to the plate, but the bases on one side were warped. I tried the single wall again. It printed perfectly. I didn’t do anything special in between these prints, just scraped the models off the build plate, and cleaned with IPA and paper towels. This wasn’t really necessary, but I liked to confirm there were no bits of cured resin on the plate that might fall into the vat and mess up a print. I tried printing four walls again but they turned into an inexplicable gooey mess on the build plate and a thin rectangle of cured resin stuck to the bottom of the vat, with the first few layers of the base of each wall embedded in it. It was a huge, time-consuming hassle to scrape semi-cured resin off the bottom of the vat without damaging the FEP!
I tried the single wall again and it also failed, with the same thin rectangle stuck to the FEP, and a bizarre short wall stuck to one edge of the build plate (I had centered the model on the plate in the design). There was also an thin vertical monolith hanging off the build plate.
Befuddled, I stepped away from the printer and returned to the drawing board to evaluate what had gone wrong. What had I learned so far that might explain why prints warped and-or fell off the build plate? These two types of failures seemed to share most of the same possible causes.
- Temperature: lower temperatures required longer exposure times; but the enclosure seemed to do a good job of keeping the resin well within the recommended range of 20-35 C, and I wasn’t sure how to dial in the settings to match a given temperature.
- Print settings: if there was nothing stuck to the build plate and the first few layers of the model were sinking to the bottom of the resin vat, then modifying the below settings by 10-20% could possibly help with adhesion. Increase the bottom layer exposure time. Increase the amount of bottom layers. Increase the wait time before lift on bottom layers. Increase UV power (this was a setting available for my printer for which I was not yet sure how or when to use). Decrease the lift & retract speed of bottom layers. Decrease the lift & retract speed of bottom layers.
- Build plate calibration: if the print failed and there was only a thin layer that sunk to the bottom of the resin vat, then the build plate might’ve not been aligned correctly.
- Tilt: using the slicer software to design a model tilted at an angle between 30-45 degrees, with supports, helped alleviate a lot of pressure between the build plate and FEP, allowing the build plate to win the tug-o-war contest of holding onto the model, especially during the initial layers of the print.
- Damaged FEP: if the clear plastic sheet on the bottom of the resin vat is scratched, dented, cloudy, or (worse) punctured then this could cause prints to fail because the build plate wouldn’t have a flat surface on which to land. It was unclear how much scratching and cloudiness necessitated a FEP swap, but one source suggested that a FEP film typically needed to be changed after every twenty prints.
- Hardware failure, for example, a faulty LCD screen or light source. This would be the last to replace, after all other possible causes were eliminated, but from what I read (and experienced first-hand) it was one possible culprit if nothing sticks to the plate at all.
How would I troubleshoot my failure to print the terrain? I’d stick with the constants: the same STL file that succeeded initially for the single wall, and the same slicer settings.
Hardware failure was beyond my control, so I’d eliminate all other possible problems before contacting support again.
Printer settings were important. I’d explore these later, but since the printer settings remained a constant throughout all prints, it didn’t seem the most logical place to start.
I also had faith the build plate was properly calibrated.
I would try tilting the model on supports later.
First I’d try replacing the FEP. Changing the FEP was a colossal pain in the ass, taking about an hour. All those little screws, getting the tension of the plastic strung with such precision over the resin vat frame. A couple of the videos I saw online even suggested getting an audio diagnostics app to register the exact pitch the film made when tapping it. Good grief, did I need to be a percussion technician now, too?? All I hoped (and prayed) was that I had secured the FEP onto the resin vat in a way that was not too loose nor too tight. The worst possible scenario would’ve been a leaky resin tray pouring uncured resin into the chassis of the printer.
I re-leveled the build plate, secured the resin tray, poured in the resin, heated the enclosure for an hour to ensure the resin was at the right temperature, and printed the same single wall design. How did it turn out?
Well, the results were mixed. Technically the print failed, but it failed in a way that suggested the new FEP had helped. The good news was there was no resin leak, meaning I had actually installed the new FEP properly; and the base of the wall model printed fine and remained attached to the build plate. The bad news was that it stopped printing on the normal layers, about half way through the wall. There was the same rectangle stuck to the FEP, and the same thin vertical monolith in the same position as before, so the FEP appeared to help, but there problem was clearly somewhere else.
What could have caused the print quality to deteriorate, when all other variables remained the same?
I tried printing the same single wall at an angle next, using medium supports to hold up the model. It failed, resulting in the same rectangle of cured resin stuck to the FEP, a thin rectangle stuck to the build plate at the same angle as the model, and the same thin vertical monolith as before.
It was time to step back once more and consider everything that had happened since the LCD screen had been replaced. Typically I cleaned and recalibrated the build plate between prints, regardless of success or failure. Temperature and printer settings remained constant. Model design remained constant, with the exception of a couple attempts at modifying tilt angle and supports that didn’t make any noticeable difference.
- Replaced LCD screen.
- Successful print of default Anycubic model.
- 4 consecutive successful prints (custom models).
- Partial success of one print, with warped edges.
- Successful print of 1 custom model.
- Failed print, with rectangle of cured resin stuck to FEP, and a thin vertical monolith of cured resin stuck to build plate.
- Failed print, with same results as above.
- Replaced FEP.
- Failed print, with distorted yet slightly better results.
- Failed print (after modifying supports and tilt angle of model).
I posted the above info along with my printer setting on the Reddit forum for Anycubic Photon printers, but twenty-four hours later there were no significant replies.
I commented on a Youtuber’s video about struggles he had experienced with the same printer. The Youtuber replied to me, explaining he had given up on this model of printer, and had instead purchased a smaller, cheaper printer from another manufacturer, the Elegoo Mars 3, and it was kicking ass.
With no more apparent troubleshooting options, I opened another ticket with Anycubic support. I stepped through the same routine as before, updating the firmware, checking the hardware connections, running the UV exposure diagnostics. The support guy concluded it was yet another bad LCD screen, and had one sent to me. I figured it would be delivered on another slow boat from China, arriving in three or four weeks.
Meanwhile, I still had model terrain to print before our next, so I decided to gamble on another printer, the Elegoo Mars Pro 3 that the Youtuber had recommended. By some odd coincidence the new printer and the replacement LCD screen for the original printer arrived on the same day. This time the replacement part had arrived in less than a week! But I wasn’t in the mood for more repair and troubleshooting. I had stuff to print. The new printer was up and running quickly, completing its first test print within hours of its arrival on my doorstep. The first print was a success!
I tried printing the single wall again, with the addition of a raft and supports. The new slicer software was not as intuitive as the previous app I had used, but it was easy enough to figure out. It resulted in another successful print!
Next, I duplicated the single wall and printed three walls. Success! I churned through another two prints of the same three-wall model to get the wall pieces I needed. All turned out perfectly.
The 3D print shop was back in business, producing all the prints I needed to enhance our gaming experience and to satisfy my curiosity with the tech. It had been a tough learning curve, but to me this creative endeavor had been well worth the time.